What Do You Need to Know Before Installing Interior French Doors
Say "Qui" to a set of beautiful doors
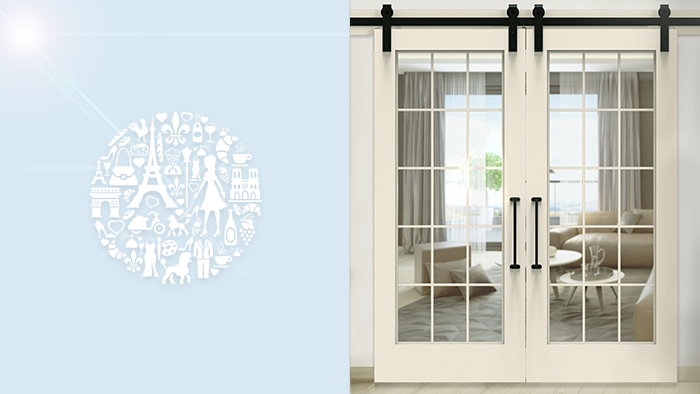
Blending privacy with visibility is what makes French doors such an attractive option for inside or outside your home. The fact that they're beautiful doesn't hurt, either.
French doors can provide your home with a timeless design that conveniently and stylishly connects ii spaces and affords you lot the do good of natural lighting. Whether they divide your living room from your dining room, or an outdoor patio from your kitchen, French doors are a gorgeous pick that helps make an easy transition from one area to the side by side.
Get prepare to transform the await experience of your habitation with a stunning set of French doors. Whether you're looking to add a French door to an existing door frame or install pre-hung French doors and make employ of a window transom to top it off, we've got some footstep-by-step tips to exercise it yourself!

How to install outside and interior French doors in a existing opening
Step 1: Prep the opening
Figure out your space's opening for where you want install your doors. You're more than likely going to be removing the drywall and/or trim around the space. A rubber manner to remove the trim without damaging the wall is to score some caulking effectually it and and then pry it off with a crowbar or pry bar. Once you've got the trim off and plenty drywall removed, measure the width.
Step 2: How to install pre-hung interior French doors
Remove the caput and inside jambs (which are usually nailed together to assistance with ease of removal). Adjacent, slide the pre-hung French doors into the rough opening, making sure the jambs are flush with the wall.
Note: Make sure you check to ensure the doors open up in the desired location without an obstruction.
Step three: Apply a shim
To make certain the door is level and straight, you'll want to shim the jamb plumb. Keep slipping shims under the side jambs until the caput jamb is level.
Stride 4: Studs, run across frame
Now it's fourth dimension to nail your frame to the studs using #8 finishing nails through the frame and shims and into the studs. Before you finish nailing all the nails, check the door to meet if it opens and closes accordingly.
Stride five: Apply trim
It's time to bring it all dwelling house so that your French doors look pretty and flush in your previously open up space. Use some #half dozen finishing nails to drive through the trim and into the studs behind the wall. Adjacent, trim any exposed shims, and finally cut and install trim for the other side of the doors.
If that'due south all the room that that your space will allow, then you're done. Get prepare to enjoy your new French doors!
BUT, if you've got a bigger space to fill, or just desire to become fancier with your French doors, then you lot're going to need to build and install a transom window for the top of the doors.
Here are some helpful steps to accomplish that DIY French door install projection.

How to install pre-hung interior French doors with a window transom
Footstep 1: Pick upward where you left off
First, pick up where y'all left off in Step Five of our French Door installation tutorial above. Subsequently you have your doors in identify (minus any framing on tiptop), measure out the higher up space door infinite to roughly see how much opening you lot're working with.
Note:You lot may want to make the window ¼ inch smaller than the allotted space'south width and height so that you tin can use shims to ensure it is level and plumb.
Step ii: Build & style your window
Determine how many separate windows yous want your transom window to accept – two, 3, iv? In one case you lot've decided, yous'll desire to measure the spacing so that you can fit all of them equally. Adjacent, cull a door jamb stock from the moulding aisle of your local hardware shop. Information technology should be approximately 4-9/16in.
Cut 2 long pieces from the moulding to run forth the tiptop and bottom of the transom window, forth with your sides and however many dividers you decided to make for separate windows. For example, if yous want a window that has three panels, then y'all'll need two dividers that are the same length as your sides. Using gum and 16-approximate finish nails, you tin can begin to construct the window unit.
Footstep 3: Moulding for window glass
Now, information technology's time to figure out how to get your drinking glass pane to fit into your window. In this instance, ¾ in. moulding works bully for this frame piece. Once you take the frame piece measured and cut, you lot can install information technology with glue and 18-approximate brads to the within of each window pane opening.
Next, it's time for the actual install. Just slide the window into the opening above the doors. Shimmy it in a few places and secure it with more 16-gauge nails.
Stride 4: Clean it upwards and paint it
Once your transom window is installed, y'all tin can add door casing and decorative trim if you desire, as well as caulk every seam and fill in any nail holes with wood filler. Depending on what color or natural stop yous're going with, you can pigment or stain the piece (and your doors, likewise) at this point.
Step 5: Cut your drinking glass
It'due south up to you whether yous want to cut this on your own or special order information technology from a hardware shop. Notwithstanding, since your window is going to be within 24 inches of an active door, residential building lawmaking calls for the glass to be tempered. Cut it yourself may exist more than you bargained for.
Once you have your glass (1/8 in. thick tempered drinking glass works cracking), you're ready to run some silicone caulk along the flat side of the frame/trim yous added before and press the glass firmly into identify.
Pace six: Add some other layer of trim
Leaving the window installed equally is isn't safety. Once again, y'all'll want to cut more quarter-round trim to serve as a second prepare of framing. Very carefully, blast this new chip of trim to the frame and then that it sandwiches the glass safely and stylishly.
Stride 7: Add door hardware & handles
The last step separating you from a set of fully functioning French doors is to install any hardware, such every bit a ball catcher and brackets to ensure your doors don't jerk when closed and your handles/knobs of choice.
Finally, you tin can stand back, admire your piece of work and beloved your new French doors knowing the difficult piece of work you put into building them will pay off for years to come. If you listen closely you lot can actually hear the compliments pouring in from time to come guests. If you take your optics set up on your next befouled door install, bank check out our step-past-step guide on How to Install a Barn Door.
#Rustica
Rustica Hardware French doors
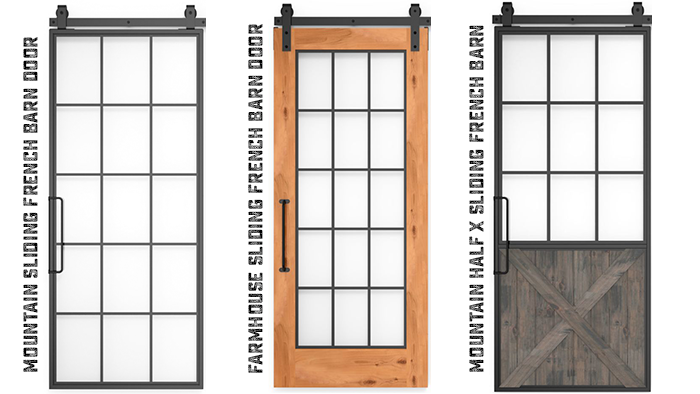
French Sliding Barn Doors:
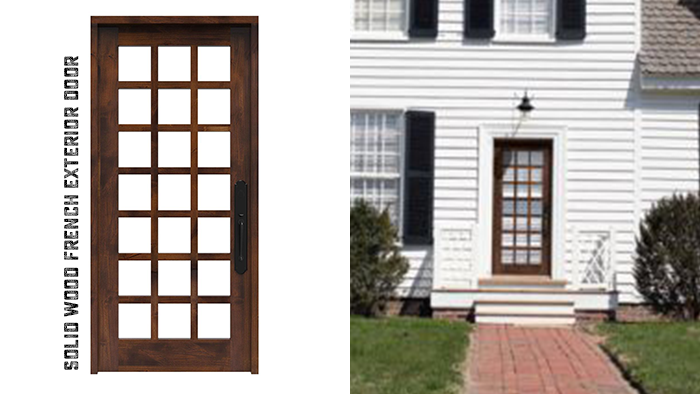
Front Entry French Barn Doors:
Source: https://rustica.com/how-to-install-french-doors/
0 Response to "What Do You Need to Know Before Installing Interior French Doors"
Post a Comment