You Want to Use Preloaded Art in Excel to Detail a Process
How to Create Flow Nautical chart in Excel?
Flow chart in excel is an too known as process chart in excel, it is used to stand for unlike steps involved in a procedure from start to end, information technology has predefined shapes to represent every step involved in the process, to use this chart we need to utilise the predefined templates of smart art in excel.
Menses Chart Excel Examples
You can download this FlowChart Excel template here – FlowChart Excel template
Instance #1 – Create Flow Chart using Shapes (Footstep by Footstep)
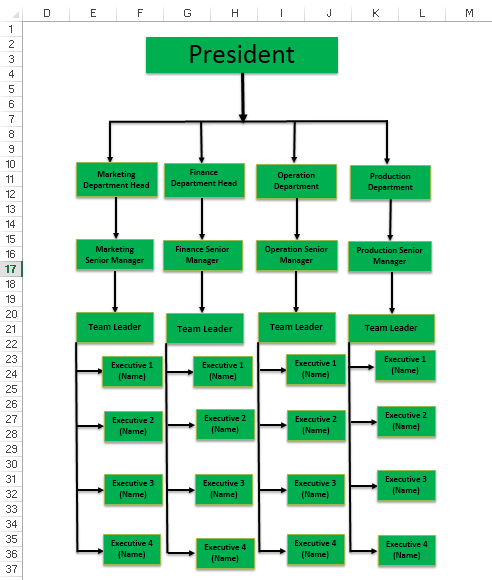
Firstly let'south build a flow chart of i of the popular flow nautical chart i.e. organizational hierarchy chart. Below is the flow of communication in the organization.
President > Departmental Heads > Senior Manager > Manager > Team Leaders > Squad Members.
This is the typical organisation catamenia nautical chart nosotros usually get to see. In this article, we will learn to create a period chart in excel using shapes.
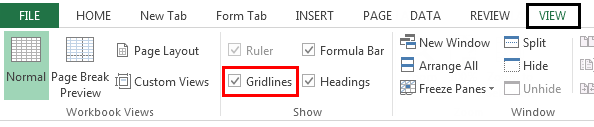
- Remove gridlines from the worksheet Gridlines are trivial lines made of dots to divide cells from each other in a worksheet. The gridlines take slight faint invisibility; you can observe it in the page layout tab. This option has a checkbox; for activating the gridlines, you can tick on it and untick if yous wish to conciliate gridlines. read more .
- Go to Insert > Shapes > FlowChart > Rectangular shape.
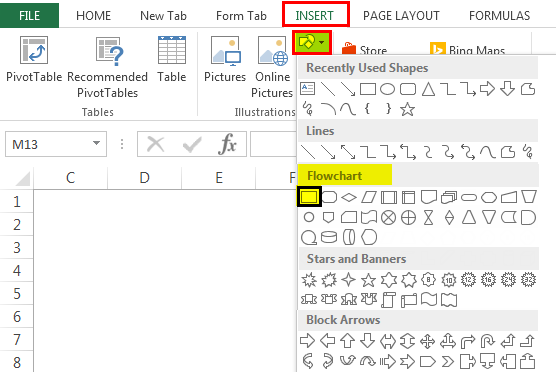
- Let's depict this first.
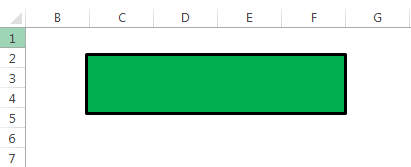
Note: In order to fit column and row ends hold the ALT primal and conform.
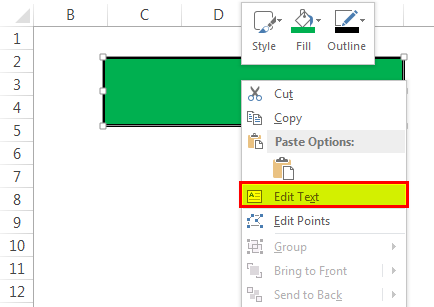
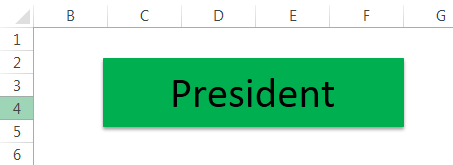
- Right-click and select EDIT text.
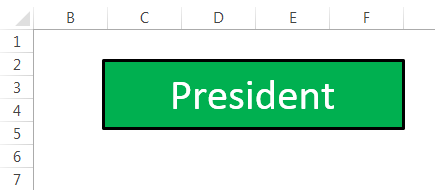
- Type the discussion, President.
- This shape not looking dandy. Under Format change the format of the shape as shown in the below image.
- Now the first position in the organization is over. Under him there are 4 departmental heads will come. For this draw directly line arrow.

- Now we need to describe one horizontal line for all the departmental heads.

- Insert four more than arrow lines.

- Insert 4 more rectangular boxes under each arrow.
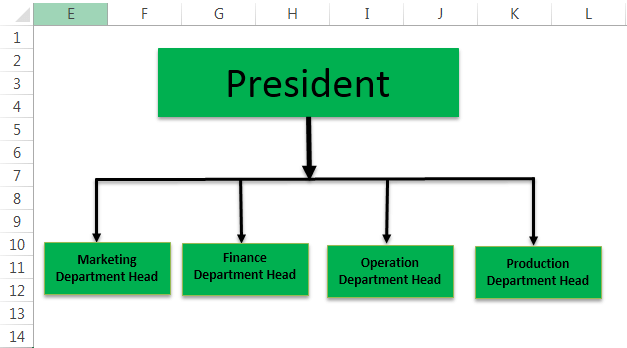
Note: I accept added 4 departments. Y'all can alter equally per your requirement.
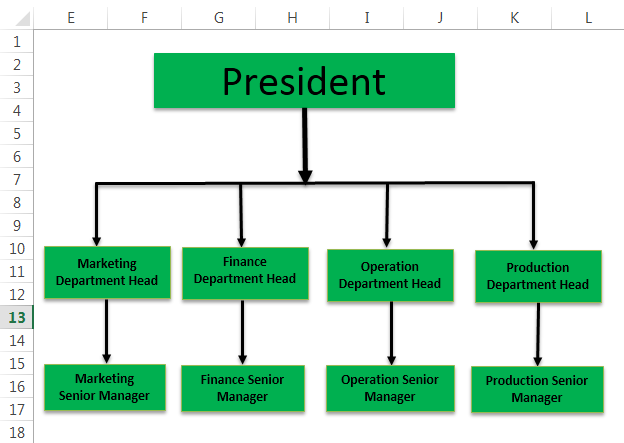
- Once the department heads boxes drawn. Describe 4 more arrows and iv more rectangular boxes for Senior Managing director.
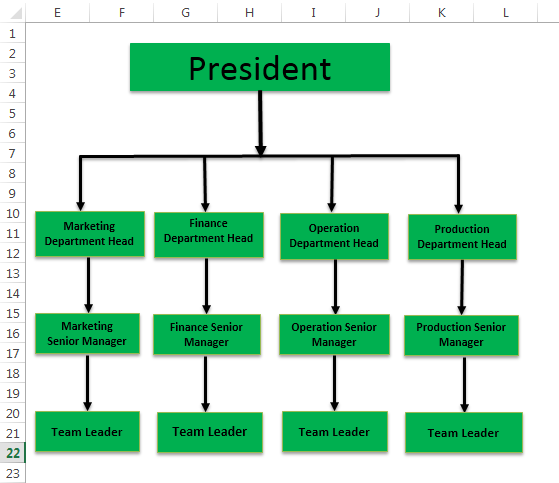
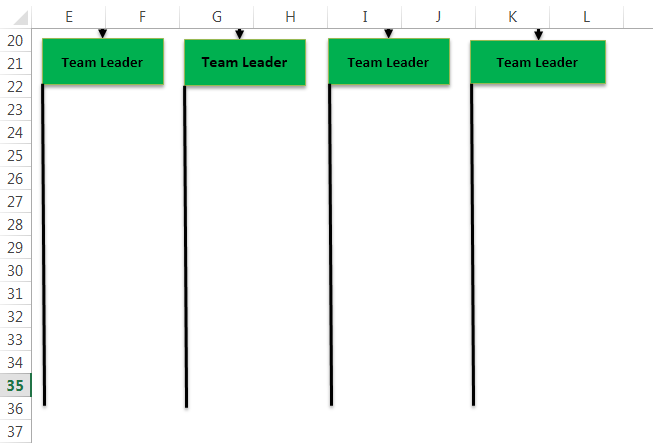
- Under Senior Manager, Squad Leader will appear. Draw iv more arrows and 4 more rectangular boxes for Team Leaders.
- Under each team leader four executives will come. For this first depict one direct vertical line under each team leader equally shown in the below image.
- For each vertical straight line depict 4 horizontal arrows. Totally describe 16 horizontal arrows.

- Insert 16 text boxes in forepart of newly fatigued horizontal arrows. For starting time box type Executive 1, for second box type Executive two, for third box type Executive 3, and for fourth box blazon Executive 4.
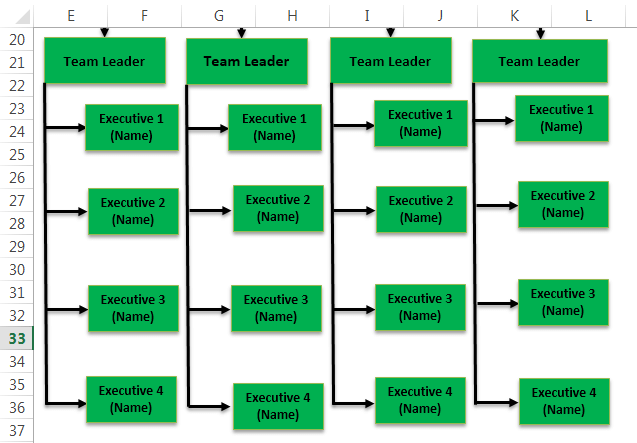
- So now our flowchart for an organization is done. A catamenia of communication is articulate with this nautical chart. Each position in the system in aware whom they should contact to communicate their messages.
Example #2 – Creat Business FlowChart Using Smart Arts (Step by Step)
We have seen the steps for creating a typical excel flowchart using shapes. Using Smart Arts will make the flowchart looks cute. Under the Smart Arts flowchart is already pre-divers if nosotros need annihilation extra we need to make arrangements.
In this example, I will explain the process involved in establishing a new visitor.
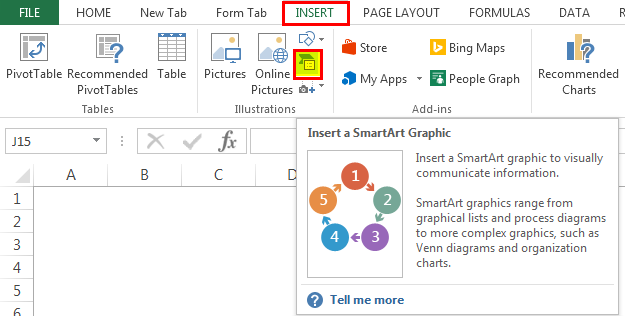
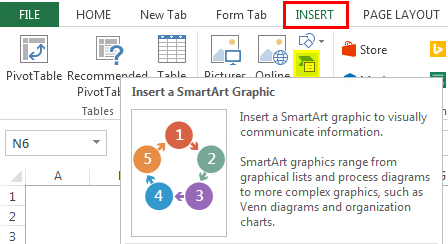
- Footstep ane: Go to INSERT > Smart Art.
- Step 2: Nether the Smart Art select Procedure. Curl down and select the Repeating Bending Procedure.
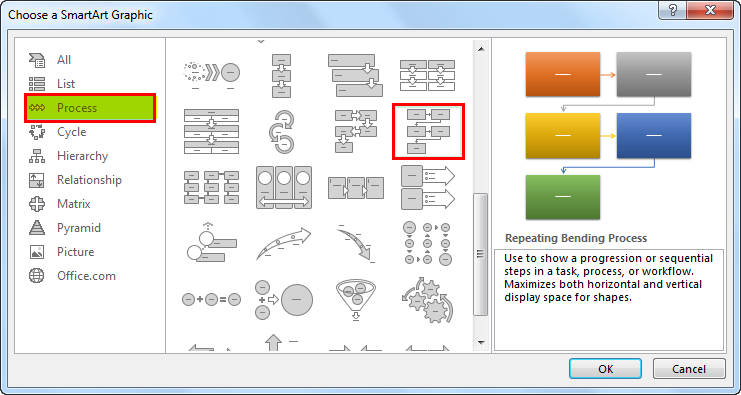
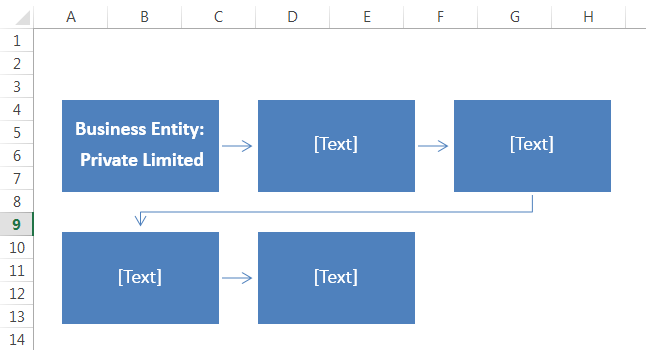
- Stride 3: Now we have a default flowchart.

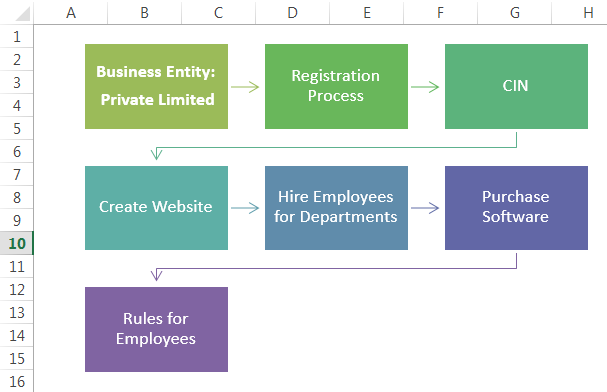
- Stride iv: The reward hither is we accept pre-drawn shapes. For the first box type Business concern Entity Type: Individual Limited
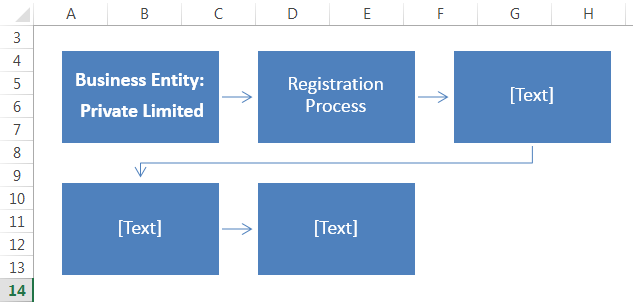
- Step 5: The next footstep is to Registration Process.
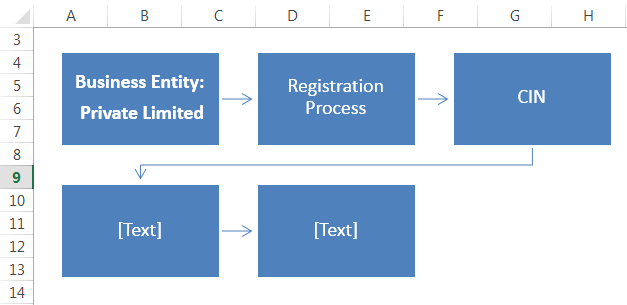
- Step vi: Next obtain Company Identification Number (CIN).
- Stride 7: The Fourth step is to create a website for your company.
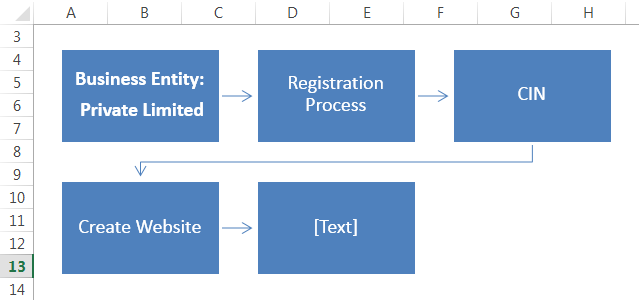
- Step eight: Hire employees from unlike departments.
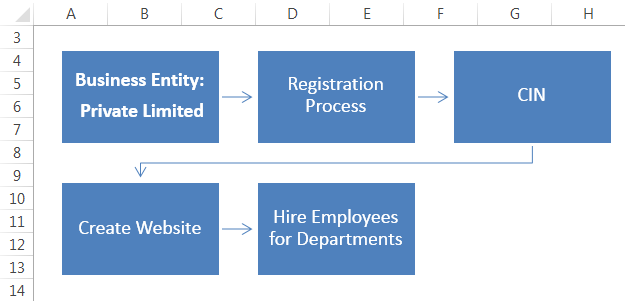
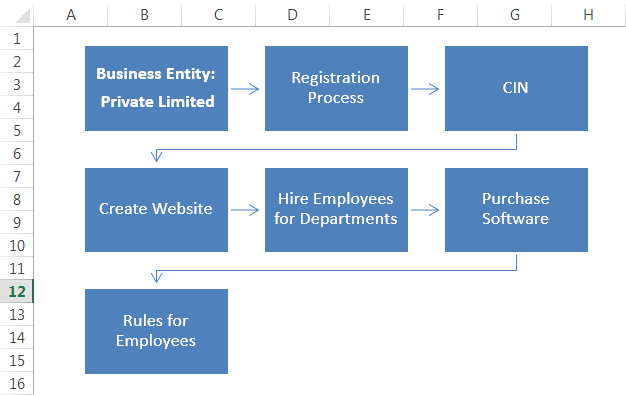
- Step 9: Now we have two more steps to enter but we don't have whatsoever shapes left. So select any one shape and paste.
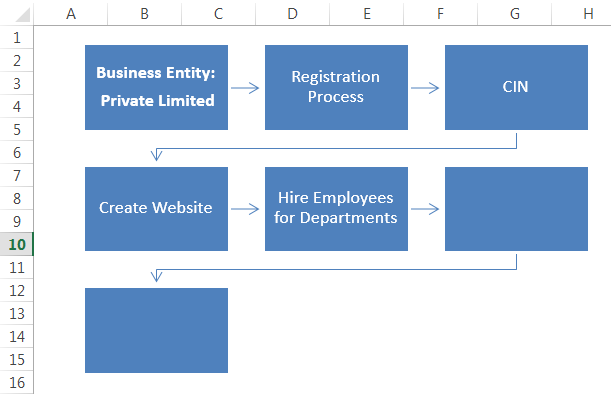
- Step x: Now nosotros take inserted two more boxes. Blazon purchase software and rules for employees in the new boxes.
Example #3 – Design FlowChart Using Excel Smart Arts (Step by Pace)
Now we have all the process in a flowchart. Let'southward blueprint the smart art now.
- Step one: Select the FlowChart Smart Fine art.
- Step two: Every bit before long equally y'all select two more tabs will announced in the ribbon. Select Design.
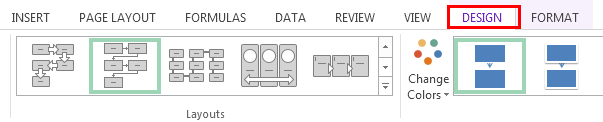
- Stride 3: Under blueprint select Change Colors.
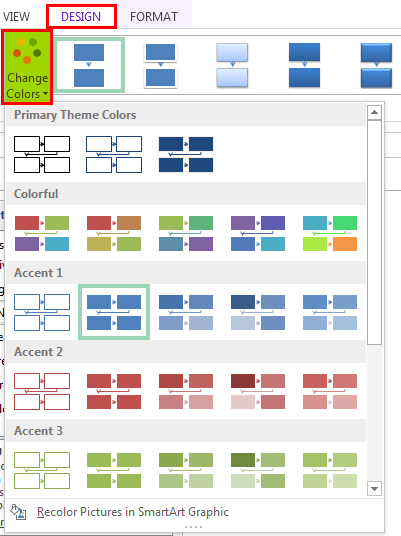
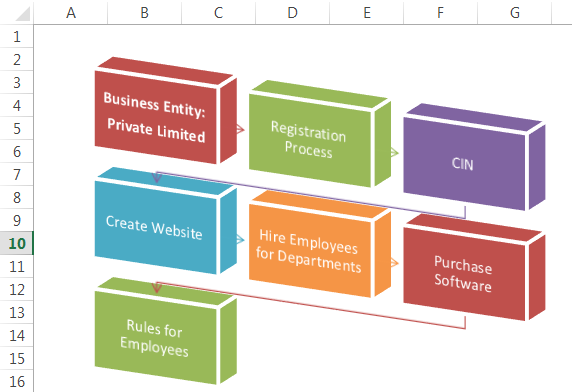
- Step iv: Here alter the colour of the smart fine art as per your wish.
- Step 5: Change the manner of the flowchart nether the Design tab.
Instance #4
We demand to follow a few steps to create the flowchart in the excel. Following these steps will brand the procedure of creating the Excel flowchart easy.
- Create a Filigree
We need to conform the size of the gridlines in excel Gridlines are piffling lines fabricated of dots to divide cells from each other in a worksheet. The gridlines have slight faint invisibility; you can discover information technology in the page layout tab. This option has a checkbox; for activating the gridlines, you can tick on it and untick if you wish to conciliate gridlines. read more to brand the shapes uniform in size. By doing this, the excel worksheet would look similar a graph paper, so information technology becomes easy to draw the shapes.
- Select all the cells by click on the triangle icon at the beginning of the column/row numbers. Keep the cursor on any of the column headers and do Right-click and select the "Cavalcade Width" selection in excel.

- When the Column Width screen pops up, adapt the number to 2.14 (2.14 is equal to twenty pixels assuming that the default font is Calibri and font size is 11 in excel) and click OK.

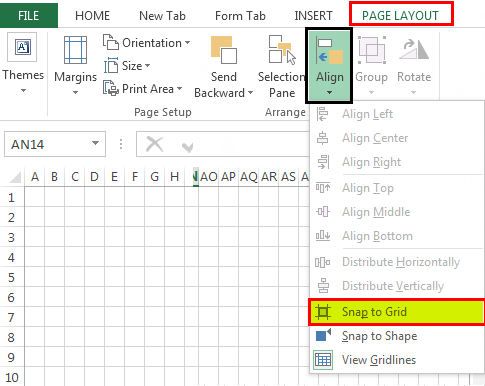
- Snap to Grid
This is the option available in the excel to snap the shape to the size of the grid ie., whenever the shape is inserted in the sheet, the size of the shape will be adjusted to that of the summit and width of the grid past enabling this option.
- Under the page layout tab in the ribbon, in the "Adapt" section, click on the dropdown below "Align" option so, in the dropdown option, select the "Snap to Grid" option.
- Folio Layout
The folio layout of the sheet should be adjusted by setting the page suspension, Margins, Orientations in case y'all want to take the print out of the flowchart or you want to copy information technology to other applications like Discussion because it would be difficult to gear up the layout once the Excel flowchart is built.
You can set the orientation of the page as either Portrait or Landscape based on the flow of the diagram. Ex: if the menstruation of the process is horizontal, then you lot need to set the page for Landscape fashion.
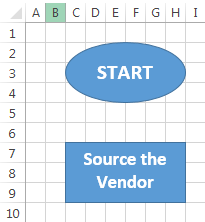
Now begin with building the Excel catamenia chart The menses chart in Excel is used to represent the various steps in a process from beginning to end. It has predefined shapes to represent each stage of the procedure. read more than using the shapes. As I've told already, commonly the get-go and stop shapes will be Oval Shape. To describe the shapes,
- Select the Shapes dropdown under Insert Tab, in the Illustrations section. The dropdown gives the options of all the shapes available and then, select the Shape yous need for your excel flowchart and insert shape on the Worksheet.

Here to start with, let'due south insert the Oval shape. Select the shape and keep the cursor and elevate it using the mouse to the size you would like to see.
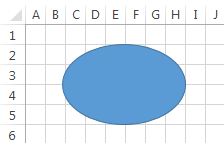
In the to a higher place effigy, you can see the size of the shape is adjusted and set within the gridlines equally nosotros take enabled the Snap to Grid option. This will get adapted while you first drawing the shape. When the shape is expanded or contracted, it will adjust to the next nearest gridline.
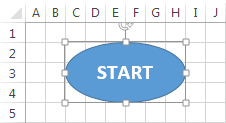
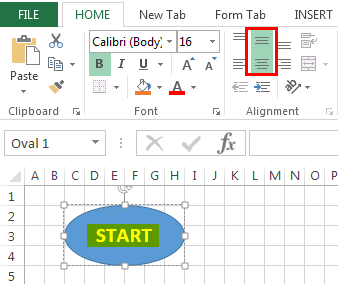
- To add text to the shape, do Correct click and select "Edit text" Selection in the list.

- Insert the text in the shape. Yous can align the text past using the text alignment options.
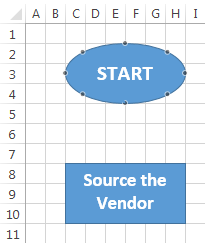
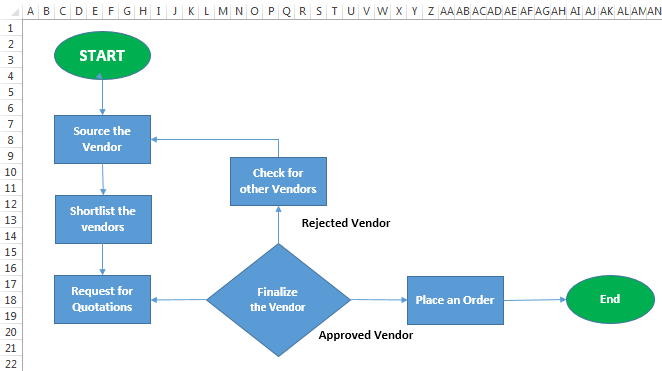
Now we need to insert the side by side shape to proceed with the side by side pace. Insert the next shape correct beneath the "Starting time". The rectangle shape tin be used to evidence the step where there is simply one option to go on farther with and the diamond shape will be used when we have two or more options to proceed farther.
The next pace is to connect the shapes. To connect the shapes, select the connector lines from the Shapes option and draw between the shapes.
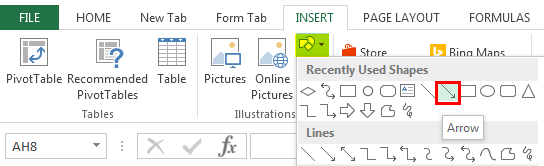
One time the connector is selected, keep the cursor on the shape and you can run across the connecting dots in the shape.
First to draw the line past dragging the mouse from any of the connecting dots and join information technology with the connecting dot of the other shape. The connecting dots of the side by side shape can be seen while cartoon the line close to the shape.

Keep adding the shapes ane after the other as per the steps involved in the process.
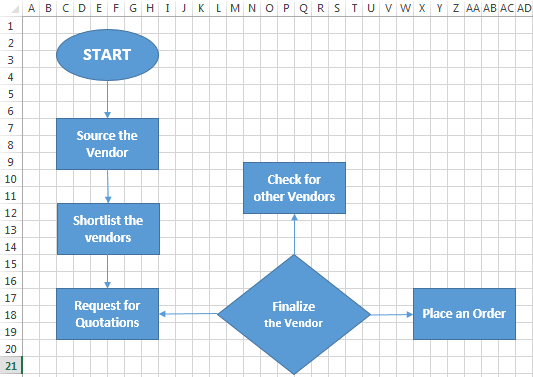
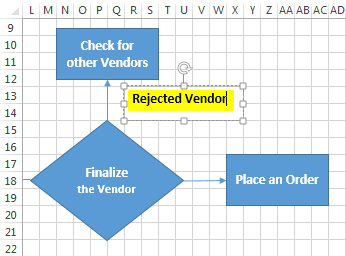
As I mentioned earlier, the diamond shape volition be used where multiple options are involved. In the above image, you can run across the period of the chart showing the unlike options associated with the diamond-shaped icon.
Each diagram shows but the footstep to be followed to complete the process. Only for a clear understanding of the process, you can add additional information using the text box.
To add a text box,
- Go to Insert Ribbon tab in excel Ribbons in Excel 2016 are designed to help you hands locate the command yous desire to use. Ribbons are organized into logical groups chosen Tabs, each of which has its own set of functions. read more and click the Text box from the "Text" Section.
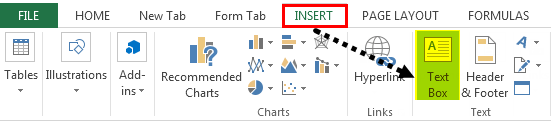
- Insert the text box past keeping the cursor in the place and dragging information technology by using the mouse. Click inside the box to enter the text
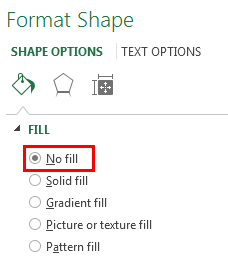
- Remove the Outline by selecting the Format Shape (Do right click on the box for option) and select No line from the format properties.
Again, utilize an oval shape for showing the terminate of the procedure.
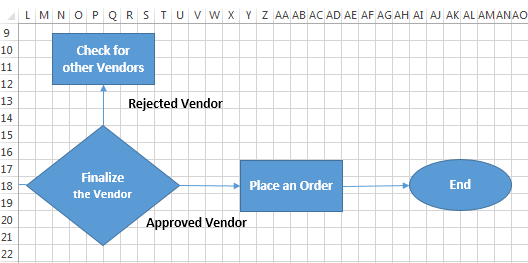
- To make the chart look better, remove gridlines by unchecking the Gridlines Box in the View tab
Now, this is how your flowchart looks after completing all the steps.
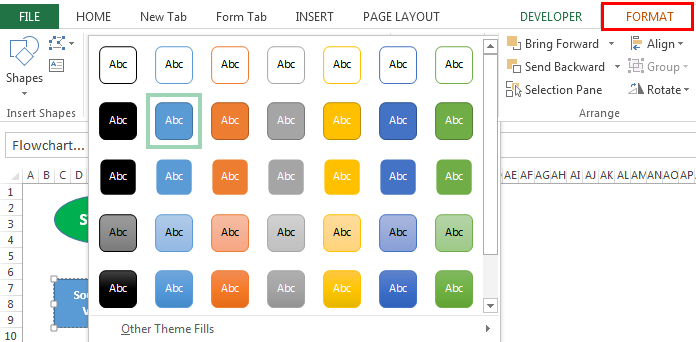
You can format the shape of each step
- Select the shape you like to format and become to Format tab in the ribbon, click on the dropdown option in "Shape Styles" section and select the format.
Instance #5 – Using Smart Art Graphic
The flowchart can exist created using the readily available Smart Fine art Graphic in Excel
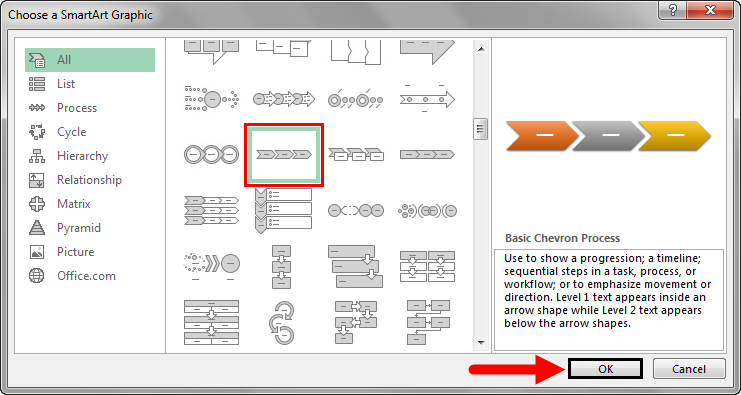
- Select the Smart Fine art Graphic in the Analogy Section nether the Insert tab.
- Select the diagram as per your requirement and click OK.
- After selecting the diagram, enter the text in the Text box.
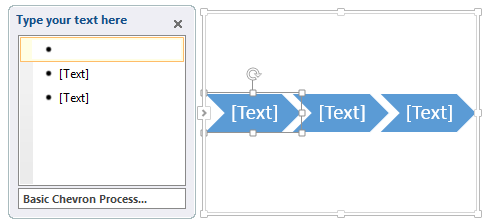
Your Flowchart looks similar as given below:

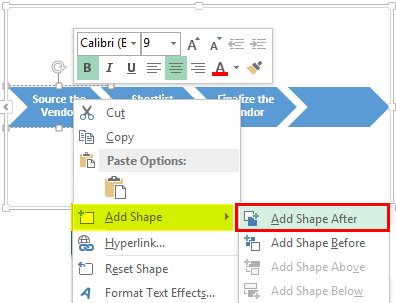
You tin add the shape to the existing diagram, Move Up/Down the shape in the "Design tab" by selecting the diagram.

Also, y'all can add shapes to the existing one.
You can download this Flowchart Examples Excel template here – Flowchart Examples Excel Template
Things to Recollect
- Use different shapes to give visual effects for creating a flowchart in Excel.
- Requite different colors to each tab while creating an excel flowchart just to make it more attractive.
- Use smart arts for like shooting fish in a barrel depict of shapes.
- In the case of more circuitous flowcharts use shapes do not use smart arts.
Recommended Articles
This has been a guide to FlowChart in Excel. Here we discuss the steps of creating a flowchart in excel Using Shapes and SmartArt along with practical examples and downloadable excel template. You may acquire more than about excel from the following articles –
- Control Charts in Excel
- Create Nautical chart Templates in Excel
- Pivot Chart in Excel
Source: https://www.wallstreetmojo.com/flowchart-in-excel/
0 Response to "You Want to Use Preloaded Art in Excel to Detail a Process"
Post a Comment